A Wormary: Alternative Home Composting Systems

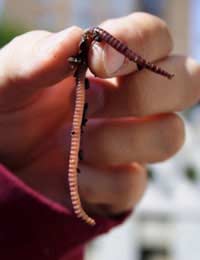
In any composting system worms and naturally occurring bacteria will be doing the work of breaking the food scraps and other compostable matter down. Using just worms to do this process is called vermiculture. A system of vermiculture which it is possible to build yourself and to keep within the house, is called a wormery.
This is another great, simple and cheap way to cut down on the organic waste that your household produces. Worms eat about half their own body weight per day, and they will adjust their numbers through breeding – so the worm colony can handle however much your household gives them!
The worms produce a rich garden fertilizer, called worm castings, as well as a liquid fertilizer, which should be diluted before use on soil or with plants.
The Benefits of a Wormery
Wormeries are ideal for those living in a flat without a garden, or any space on which to put a regular compost bin.Wormeries can be small and compact and fit on a kitchen surface, or tucked away out of site on the floor. They are secure and safe, so dispel any fears about the worms breaking free and causing havoc in the house! The system produces only a small amount of compost, so is ideal for those with a limited space for potted plants or window boxes.Creating a Wormery
To create one of these systems, select a suitable container. A polystyrene fish box or a plastic dustbin is ideal. Line the container with a few sheets of newspaper. Make some holes in the containers lid for the worms to breathe, but not big enough so they can crawl through and escape! Fill the bottom of the container with several inches of sand or gravel, and place wooden slats on top of this. On top of this, put a layer of damp paper or damp shredded cardboard. If you want to use the liquid as a separate fertilizer, it is necessary to drill a hole into the side of the container, just at the level of the wooden slats, and fit a plastic tap.Add the worms, commonly known as tiger or brandling worms, available from fishing shops or specialist online stores, and add a small amount of scraps. Cover the surface of the bedding with the scraps, but leave some of the area free. Then cover the surface with a thick sheet of wet newspapers, or an old black cotton t-shirt could be used instead – the worms avoid light, so need to be able to live and work in a dark, damp environment.The Process – Inside the Wormery
Each week, add fruit and vegetable scraps to the wormery. Do this in one feed per week– save your scraps and keep to a regular schedule, while keeping an eye on how quickly the worms get through each feed. As the worms start to multiply, the amount of food given can be increased.Start off at approximately 1.5 kg the first week, to about 7 kg a week after 6 months – although this is a rough guide only. The worms will eat any type of fruit and vegetable scraps, animal manure, leaves, and damp paper and cardboard. Keep their diet to regular amounts of the same type of food.Don't suddenly give them lots of paper for instance, but introduce it slowly.Add some water every few days to prevent the compost from drying out. It should be damp, but not soaking wet.
After about 4 – 6 months, it is probably the time to check that all the food and bedding has been converted into castings. This can then be harvested, and the process started again.
- Brighten the Landscape With Recycled Art
- London Recycling
- Supporting Recycling Initiatives
- Communities Recycling - A Case Study
- Ways to Reduce Packaging and Household Waste
- Composting as a Community
- Community Recycling Initiatives
- A City Recycles: Cambridge
- Reclamation Sites
- Local Recycling Facilities


Re: Recycling Cardboard
Hello! Awesome site! Searching for lock help! Thanks:)
Re: Recycling Cardboard
Kak esehiko sminor k112 recyclingexpert.co.uk
Re: Recycling White Goods
I have my old refrigerator & dishwasher to be given away.
Re: Recycling White Goods
HI I am in need of a spider shaft for my Samsung front loader washing machine. Can anyone help me with one please I am on a disability…
Re: Recycling White Goods
I have an all drink frig and a dishwasher both domestic appliance both working need more space at home
Re: Rules Governing Use of Recycling Logo
I am so confused with recycling labels. Nothing seems standardised? Surely, it should be a case of 2 options Recycle…
Re: How to Recycle Our Office Telephones?
The Parish Council would like to donate the following phone system, if someone could come and collect it. Panasonic…
Re: How to Recycle Our Office Telephones?
We have Phones that we would like to recycle. Poly Phone models CX300 x 20 CX600 x 28 Cx700 x 2 Vvx600 x…
Re: More Environmentally Friendly to Use Glass Milk Bottles?
Why is it more expensive to wash and refill bottles for milk than using a new carton which is…
Re: More Environmentally Friendly to Use Glass Milk Bottles?
I would like to get free range milk in glass bottles, is this possible?